Sunday, June 20, 2010

Renovations Step 2: Replacing the floors, Part 2

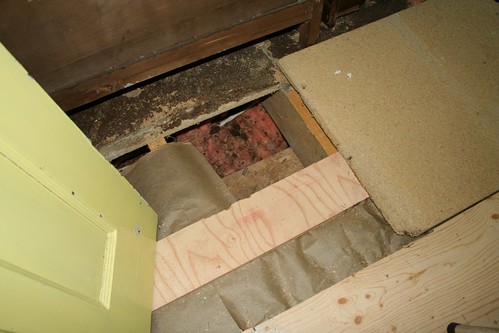
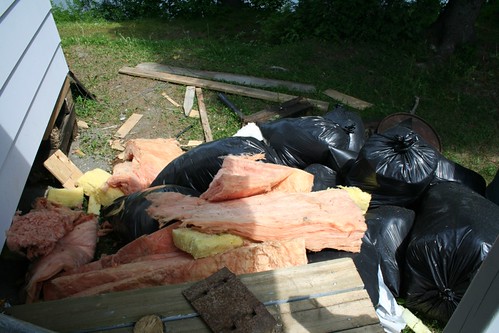
After lifting a few sections of the old particle board, it's obvious that we've had many little visitors here over the years. The little critters had made pathways alongside the insulation, which packed down so flat in many areas, that it just had to be replaced. We also found lots and lots of mouse droppings, pine cones, acorns, etc... obviously this was their home :)

Surprise! We've had some visitors over the years...

Huge pile of old insulation

So we started doing just that - replacing the insulation in spots that were bare, vacuuming all the debris left behind, and adding a vapor-barrier on top. This was no easy task... but we were lucky that my Dad was visiting from Toronto for a few weeks (at my request, since we really needed his help here). Him and my husband tackled the floors, which was completed in less than 2 weeks. Hooray!

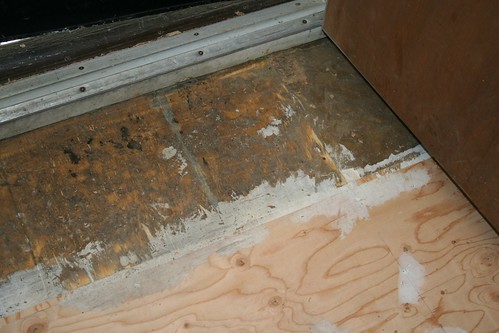
There! Now we're ready for some plywood! There are some areas where we just couldn't take out the particle board (for various reasons). Below is a photo showing the old next to the new:

Old subfloor vs. new plywood :)

Now, my goal is to be able to move in by this Winter. I don't necessarily care right now if not everything is perfect or even pretty. I just want to move in. And seeing that I can't make up my mind on flooring, and we have renters arriving soon, I wanted something I could install easily and cheaply. I also wanted something thin so that I can put real wood on top of it, whenever I decide to.

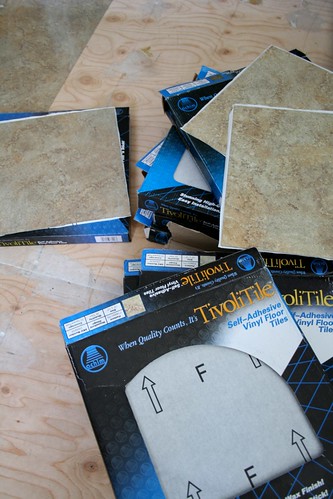
We opted for peel-and-stick vinyl tiles. These things are AWESOME! I shopped around to find a pattern that was decent, but still within my cheap requirement. I found these beauties at the local Family Dollar. At $12 a box, they were a steal! So it cost me less than $300 to redo the entire building. Can you say BARGAIN!?

These are super-easy to work with

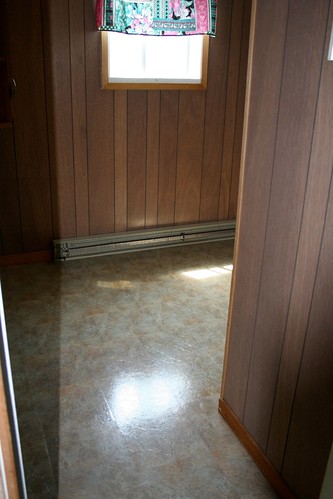
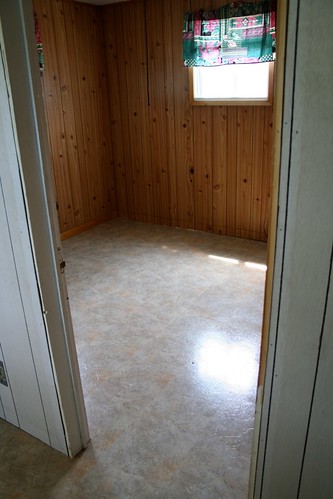
Seriously, in less than one day we had 2 rooms covered. Now that's progress! Here are the before/afters of both rooms:

BEFORE - Storage Room

Room #2

AFTER - Storage Room

AFTER - storage room

BEFORE - Office Space
(ignore the gross, stained mattress... it was there when we bought the place!)


Room #1


AFTER - Office Space


AFTER - My "office"


Now these before shots aren't terrible... the pattern of these rooms' floors weren't bad. The main room is a different story. Once that's replaced, it'll make a huge difference in there.
Friday, June 18, 2010

Renovations Step 2: Replacing the floors, Part 1

Alright - now we're getting somewhere!

We knew how warped and soft the floors were, but didn't know exactly why. Surely, it must just be all rotten under there, so let's find out.

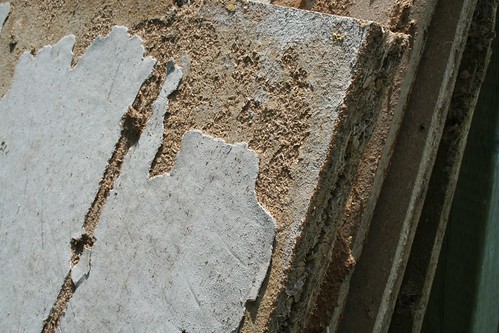
Welcome to Surprise #1: The subfloors were made of particle board. Yes, you read correctly.

The junk subfloors that were there

If you're not aware of the differences between particle board and real plywood, this junk you see above expands and warps with humidity. We live on a lake. Why on earth would you put that on your floors?!? The good news is that we know what the problem was. Now we needed to decide: do we simply add a layer of plywood on top of this stuff, or rip it all out and replace them? Obviously replacing them is the best solution.

That is, until we peeled away the old linoleum floors. Little did we know, they used 3" nails to fasten the floors, not screws. As if having to chisel away and remove every single nail was grueling enough, we then enter the 2 small rooms.

Again, peeled away the vinyl floors, and what do we find? The glued piece of the vinyl stays stuck. Everywhere. Which means all the nails are hidden. Which means we now have to actually chisel away that layer of white (see above) in order to even get to the nails! Argh! Luckily, my father-in-law stopped in just in time... he volunteered to do this part! :)

Whew. Well now that's done. Surely it'll be smooth sailing now!

Thursday, June 17, 2010

Renovations Step 1: Paint and level the structure

This camp has taken a beating over the years. The paint was severely peeling, the supports holding the building up were starting to rot and sink into the ground, and the floors were warped and very soft in many spots.

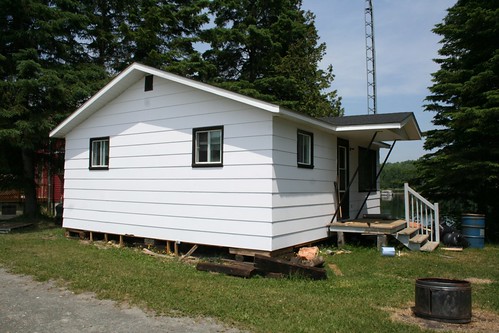
Luckily, painting the camp was fairly easy. I kept it white (for now). I wish I would've taken some more recent "before" shots, but it was peeling really, really badly! A good coat of primer, then another coat of high quality white paint, and I was done.

BEFORE:

Outside

AFTER:

AFTER - Painted the outside

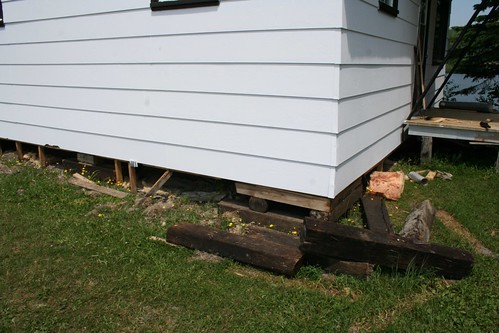
We debated whether to keep the current supports, or replace them with poured or blocks of concrete. When we took off the skirting all around, we found that most of the "railroad ties" were in really great shape! They've been solid all these years, why mess with what works?

There were a few, however, that were rotten. A nearby friend had spare railroad ties (I don't even know how people collect these things...), so we jacked up the camp, little by little, and replaced the ones that need it.

We also had to lift & level the place

Then we got to the back side: one of the main support beams was rotten... all. the. way. through. NOT fun. That'll be a project for a later date (when we have a real contractor over).

So for the most part, those two big things are done. The camp looks so much better with a fresh coat of paint, and I feel a bit safer knowing that I'm not going to sink into ground. :)

Wednesday, June 16, 2010

Studio move and renovations!

Sorry I haven't been posting much; I've been a bit busy! Busy "how", you ask?

Well, shortly after we moved to our new home on the lake, the adjacent property came for sale. We loved the spot and it would give us extra lake frontage. Yes, it had a camp on it... but we didn't care. We were buying it for the lot.

Outside

Then I started painting more and more, and my tiny little office upstairs was getting out of control. We got estimates to build an addition (which was a lot of $$$), then realized we had the "addition" right next door! All it needed was a little TLC!

We kept delaying the project, since it wasn't really, really needed (yeah right!!) and after all, my work and painting were still getting done, right? True, but it was just time. I had completely outgrown my space, and was finding it harder and harder to be creative. I needed a change!

So that's it! That's what I've been busy doing... renovating my future office & studio! Unfortunately (or fortunately!), we're renting it for a few weeks this summer. So the first big rush is to get the floors in better shape. It's really warped right now (and ugly!). We have less than 3 weeks left until the first renters arrive, so it has to get done!

I'll be posting regular updates on our progress (which we've already started), so make sure to check back soon.
Related Posts Plugin for WordPress, Blogger...